

Written by: Chris Ramlackhan
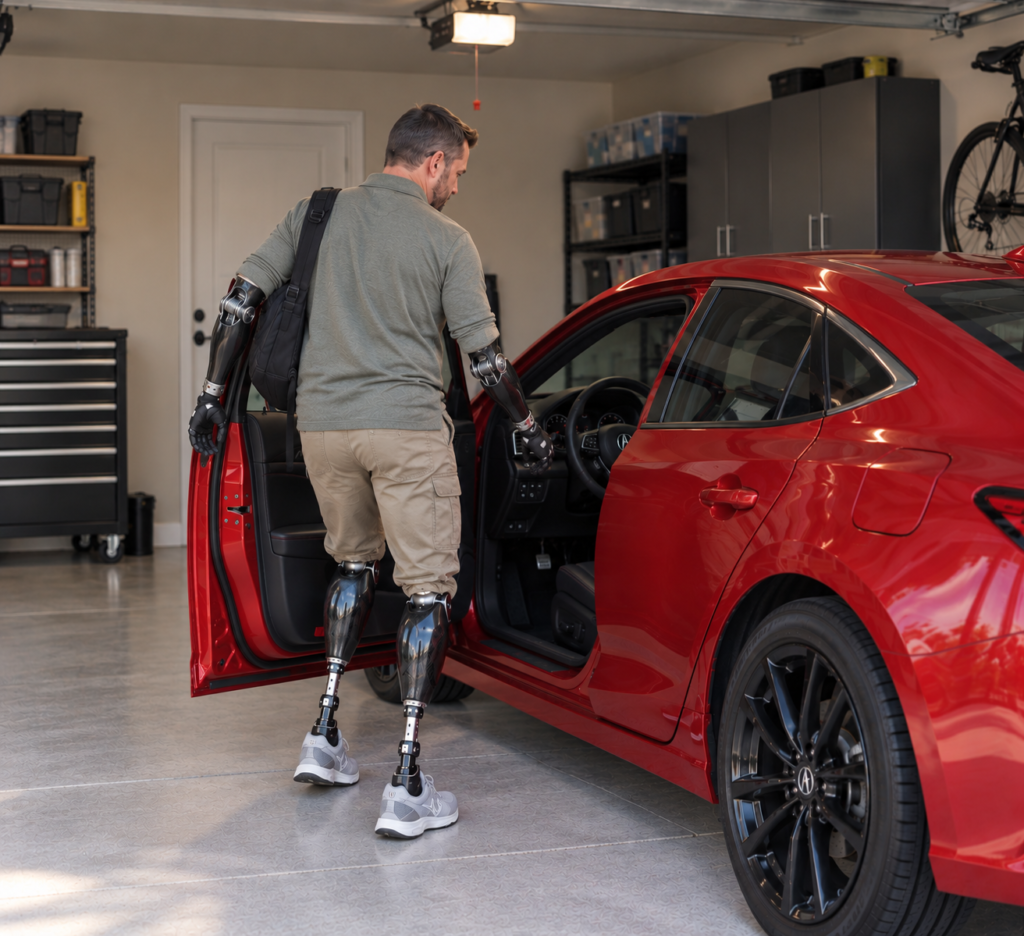
When I became a quadruple amputee, figuring out how to get back on the road felt daunting. The process can seem complicated and confusing at first, but you do not have to navigate it alone. Here is how the medical suspension and driver rehabilitation process works in Ontario, along with what I learned along the way.
1. The Automatic Medical Suspension
In Ontario, healthcare providers (such as your hospital physician or specialist) are required by law to notify the Ministry of Transportation (MTO) if you have a medical condition or functional impairment that could affect your ability to drive safely.
Once the MTO receives this report, they will automatically suspend your driver’s licence until medical safety can be confirmed. Shortly after, you will receive a official notice in the mail explaining the suspension and outlining the steps needed to restore your driving privileges.
2. Finding an Approved Functional Assessment Centre
Along with your suspension letter, the MTO will provide a deadline to submit medical documentation or complete a functional assessment. In most cases, you must undergo a formal evaluation conducted by an Occupational Therapist (OT) specializing in driver rehabilitation.
The MTO will include a list of ministry-approved Driver Assessment Centres across the province. You can choose any approved facility, but I strongly recommend shopping around:
- Compare Prices: Costs for functional assessments and lessons vary between clinics.
- Check Capabilities: Not all facilities carry the exact adaptive equipment required for complex amputations. I had to call a few places before finding one that could accommodate my specific needs (I ended up completing my training through CBI Health).
- Watch Your Deadline: If the assessment centre has a long waitlist, contact them immediately. They can contact the MTO on your behalf to request an official extension so your file remains open.
3. The Initial Assessment and Adaptive Training
Your initial functional assessment includes two parts: an in-clinic medical evaluation with the Occupational Therapist and an on-road test with both the OT and a specialized driving instructor.
Because I am a quadruple amputee, learning to drive meant adapting to an entirely new way of controlling a vehicle. The OT prescribed specialized equipment tailored to my setup:
- A tri-pin spinner knob and turn-signal extension so I could steer and signal using my prosthetic arms.
- A gas pedal extension to bring the gas and brake pedals level, making it easier to operate them with my prosthetic leg.
Following the initial assessment, the OT recommended eight driving lessons to help me get comfortable. Keep in mind that specialized lessons are an out-of-pocket expense—each lesson cost me around $150 on top of the initial assessment fee.
4. Adjustments and Crucial Safety Lessons
Driving with prosthetics requires precise positioning. During the first few lessons, my instructor and I worked on seating distance, pedal reach, and mirror sightlines. Because I cannot move my ankle, I push the pedals using my heel rather than my forefoot.
During training, we experimented with raising my foot position to relieve hip strain. However, I learned a critical lesson about pedal clearance after I got my licence back:
A Crucial Safety Tip: Never use temporary or loose floor mats to adjust your foot height. Shortly after regaining my licence, I drove without the mat we used during lessons. Because the gap between the brake pedal and the floor was too large, my foot slid underneath the brake pedal without me realizing it.
When I went to stop, my foot was pressing against the floorboard instead of the pedal. Fortunately, nobody was hurt, but it was a scary realization. Always consult your OT or driving specialist about permanent, crash-tested vehicle modifications (like a fixed heel-rest block or custom pedal guards) rather than makeshift floor mats.
5. The Final Road Test and Reinstatement
Once your instructor feels you are ready, they will notify the OT to schedule a final on-road assessment. This final evaluation involves another driving test with both the OT and instructor present (my re-assessment cost around $300).
If you pass, the Occupational Therapist submits their report directly to the MTO requesting that your suspension be lifted.
Important Note: You cannot drive the moment you pass the test. You must wait until you receive an official letter from the MTO confirming that your suspension has been officially removed. They will issue a temporary licence until your permanent card arrives in the mail.
6. Modifying Your Own Vehicle (The Final Step)
Passing your driving test in the assessment centre’s vehicle is a huge milestone, but your journey isn’t quite finished yet! Once you pass, your Occupational Therapist will issue you an official equipment prescription detailing the exact adaptive gear required for your vehicle.
- Certified Installers: Primary controls (like hand controls, pedal extensions, or spinner knobs) must be installed by a certified mobility equipment modifier. You cannot install these driving aids yourself, as they need to meet safety standards.
- Shop Around for the Best Price: Just like assessment centers, mobility modification shops set their own pricing for parts and installation labor. The same pedal extension or hand-control kit can vary significantly in price depending on where you go. Call a few certified installers in your region, send them your OT prescription, and ask for written quotes before committing to one shop.
- Fitting Session: Once the installer puts the equipment into your personal car, you will do a final fitting session to make sure everything is positioned at the perfect distance for your prosthetics.
- Licence Condition Codes: The MTO will update your driver’s licence to include specific “condition codes” (restrictions) that require you to drive only vehicles equipped with your prescribed adaptations.
Take Your Time
When you finally get back on the road in your own car, take it slow. Your personal vehicle will feel different from the instructor’s vehicle—the pedal tension, steering sensitivity, and equipment placement may vary slightly. Take the time to adjust your seat, test your reach, and practice in a quiet area until it feels like second nature.
The reinstatement process can feel intimidating at first, but remember that the assessment centre guides you through every step. If you take it one letter and one appointment at a time, you can regain your independence and get back on the road safely.

